Quickly Get Your Own Free Domain Email Using Zoho Mail
This image was published by TanteTati on Pixabay, and combined with Zoho’s logo as the cover image.
I once applied for a custom domain email through Zoho’s international website. The steps for applying via the domestic version are quite similar, but the domestic version has a great feature: as long as the domain resolves correctly, you can use the service even without an ICP license.
Application Steps
Application URL: https://www.zoho.com.cn/mail/zohomail-pricing.html?src=zmail
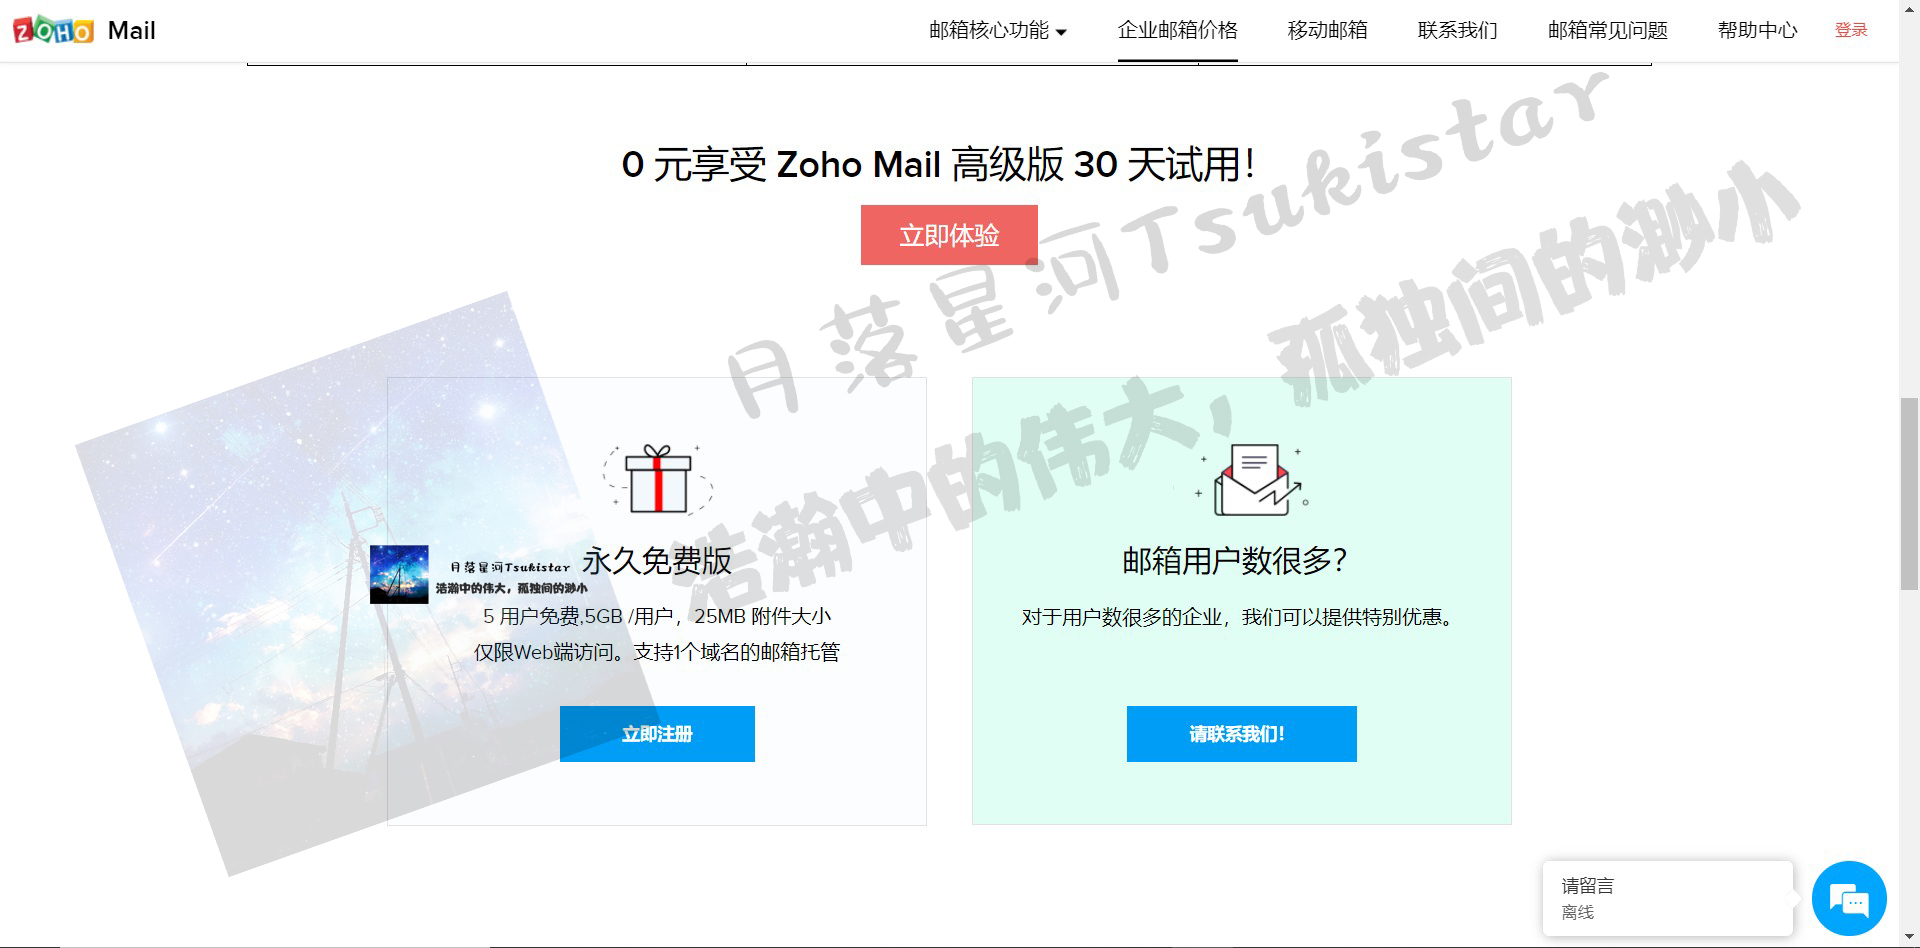
Scroll down on the website, and you’ll see an interface like this:
Filling in Information
Click “Sign Up Now” under the Free Forever plan to enter the following interface:
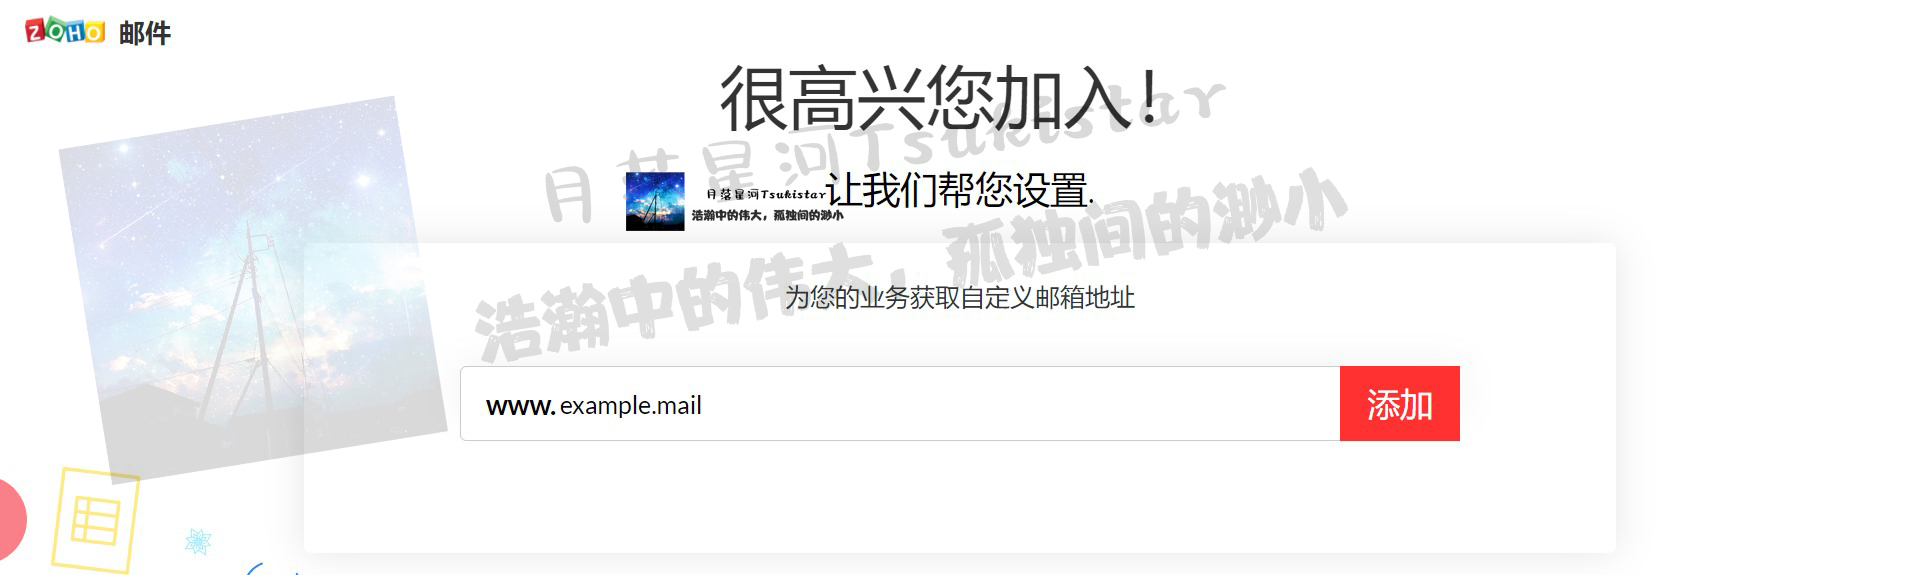
Since my domain is already registered, I used example.mail as a placeholder for this demonstration. This doesn’t affect the process; you can enter your own domain name during the application. Next, fill in the registrant’s information:
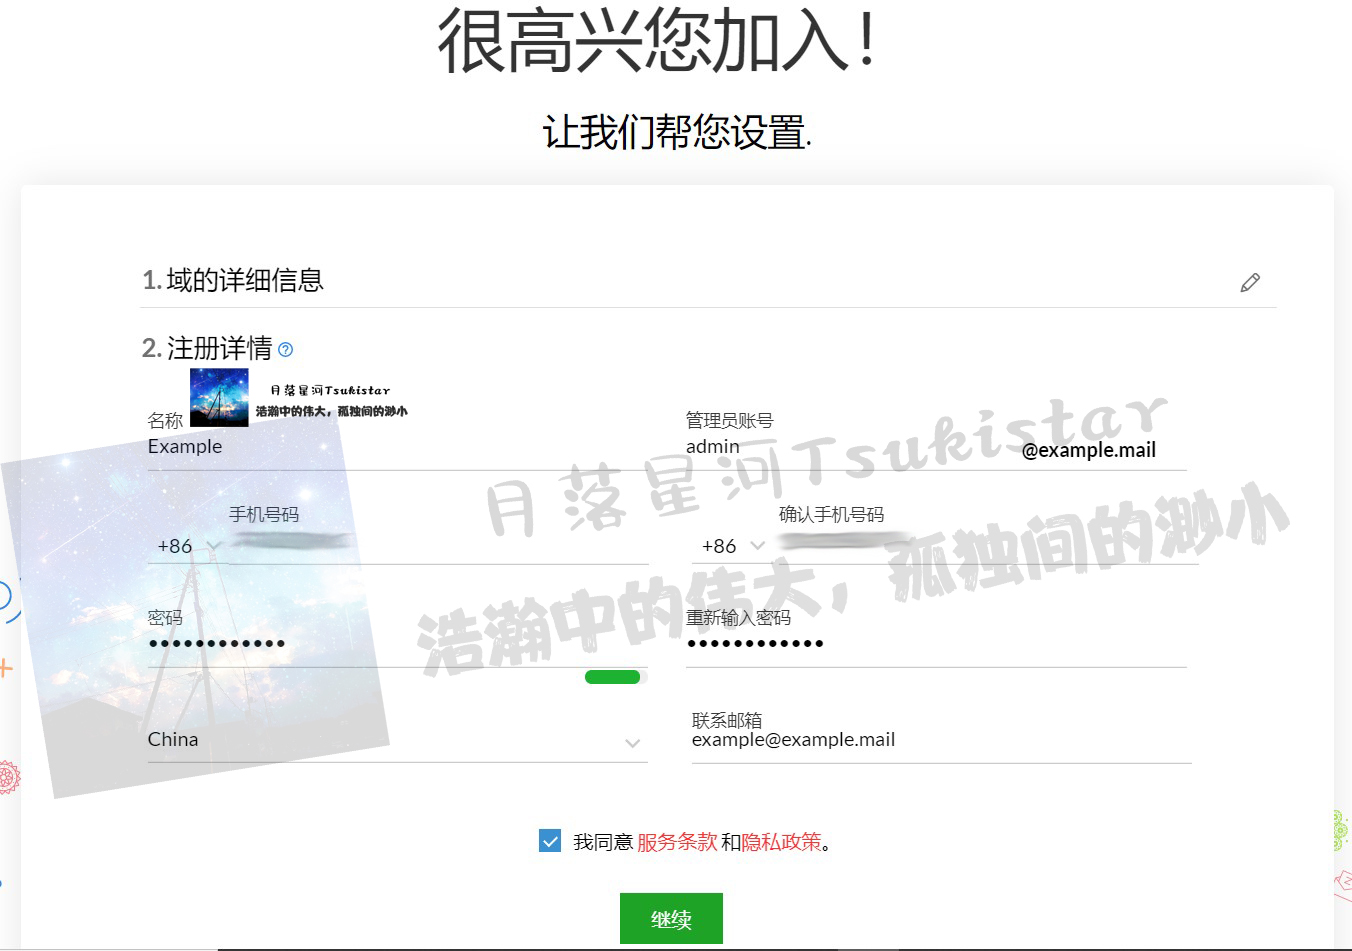
Once completed, click Confirm.
DNS Verification
On the next screen, you’ll be prompted to verify your domain:
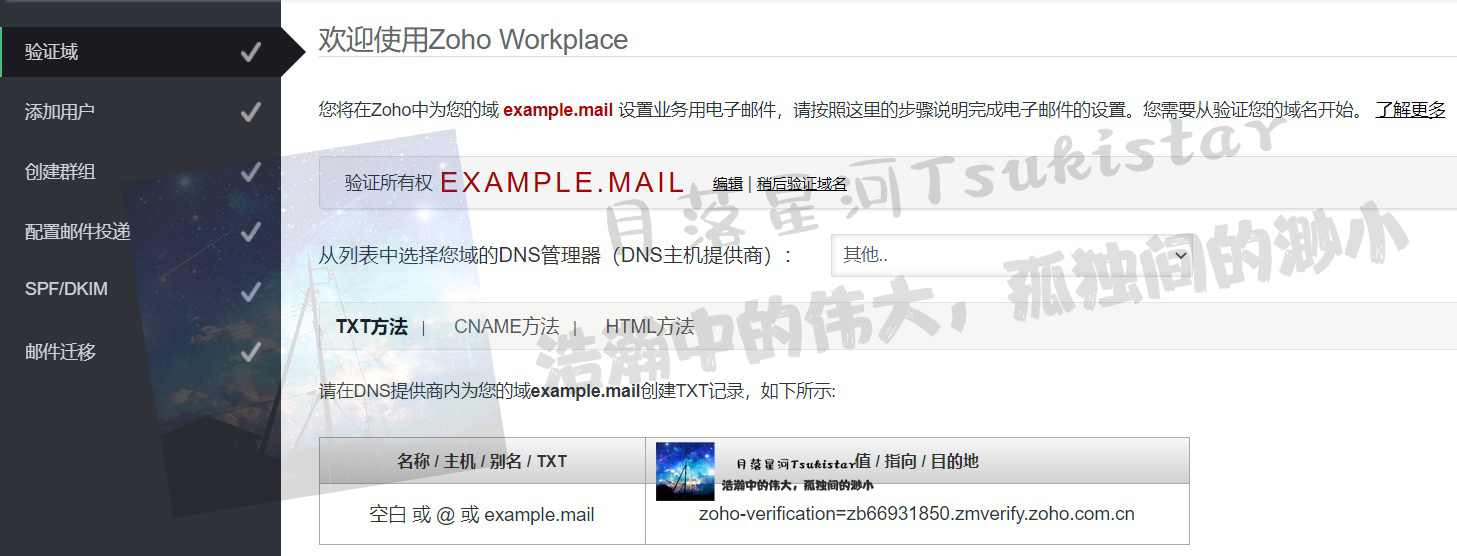
I used the TXT verification method. As instructed, I set the DNS configuration as follows (using my own domain):

After configuring, wait for one TTL (this depends on your settings), then click Verify to complete the process. After this, you can set up users.
Is that all?
If we stop here, although the email can send messages, it won’t be able to receive them. This is because we haven’t configured MX records for the domain, so other email systems cannot find your mailbox. Therefore, follow the steps below to configure MX records:
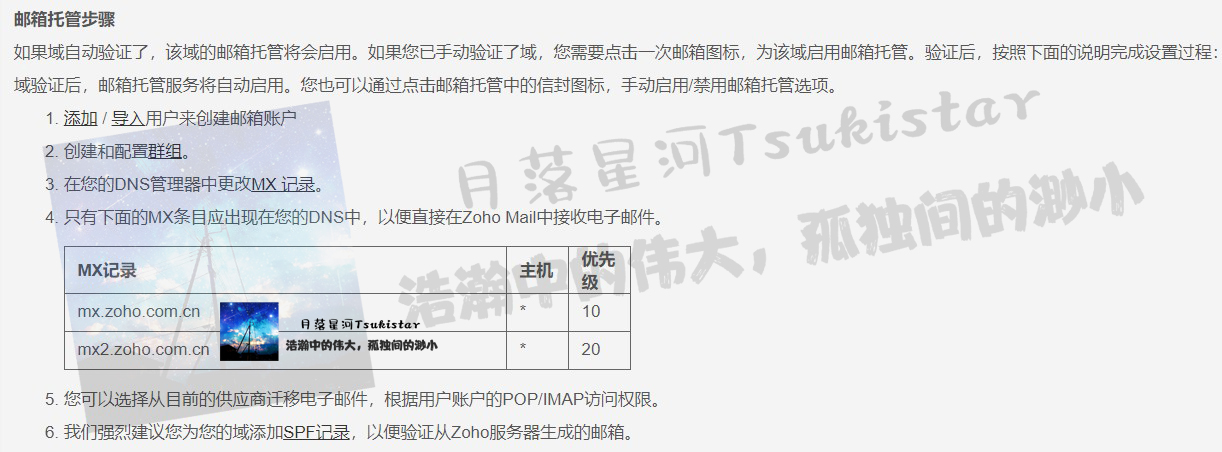
Set the following records in your DNS control panel:

Once completed, you’ll be able to receive emails successfully~
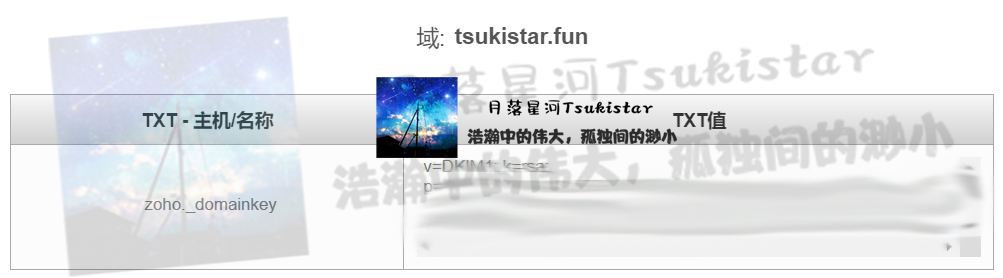
Advanced Operations: Adding DKIM and SPF Verification
To prevent your emails from being marked as spam, enable SPF and DKIM verification. Add the following two TXT records using the same process as configuring TXT records described above:

Unless otherwise stated, all articles on this blog are licensed under CC BY-NC-SA 4.0 license. The author reserves all rights. Please credit the source if you wish to reprint.