
A Bumpy Experience of Setting Up Gridea
I decided not to let my Github Page sit idle, as posting some technical articles on it should be useful, and it would also serve as a personal note for future reference while encountering similar issues.
Someone in a group recommended using Gridea for static blog, so I looked it up, downloaded it, and found it to be very clean and user-friendly. Writing articles is convenient, and the theme was also quite satisfactory, so I decided to try connecting it to my Github Page.
Remote Connection and Synchronization
For the configuration, there is a corresponding tutorial on the official website, so I won’t repeat it here. After filling in all the information, I encountered an issue where it couldn’t connect to the remote successfully. No matter how many times I double-checked the repository name, username, or changed the token, it still didn’t work. After searching for solutions, I opened the console and found the error message: spawn git ENOENT ... at Process.ChildProcess...ickCallback.
The solution was to edit the “Path” variable in the environment variables (System variables for Windows, Environment variables for Mac/Linux). I added two new paths: one for the Git bin directory and one for the git-core directory. The paths should look like this:
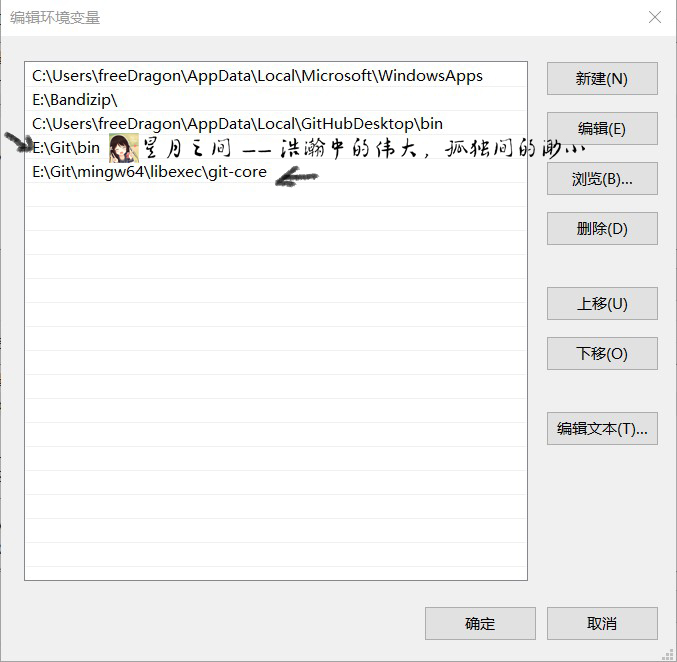
After making these changes, restart the Gridea client, and the remote connection should work successfully.
Then, there was another issue during synchronization, where it showed “Synchronization failed. Please refer to the FAQ or contact the author for help.” (At least there was a help interface, but the error from the remote connection was already listed there, yet it didn’t guide me to check this.)
Again, I opened the console, and the following exception was displayed:
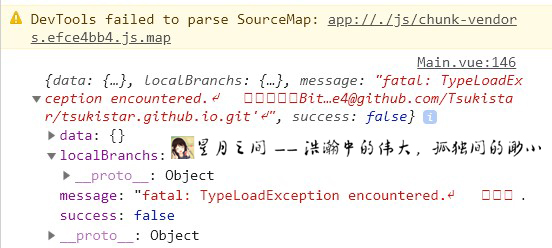
Double-clicking “message” reveals all the error information, which I copied and pasted for review (I even used Google Translate for easier understanding):
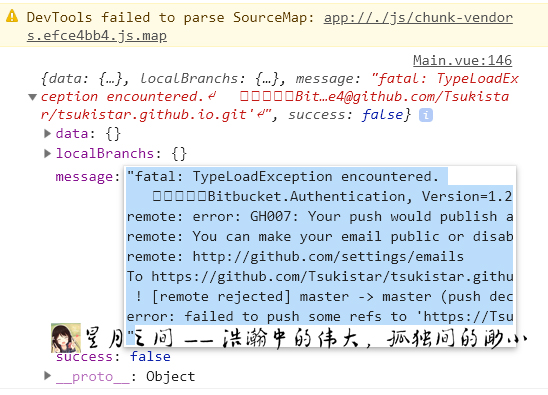
The issue was caused by the fact that my email was set to private, which prevented the git command from running correctly. After changing this setting on GitHub, synchronization succeeded and the success message appeared:

At this point, the basic functionality was successfully set up.
Configuring Gitalk Comment System
I wanted to add a comment system to my blog, and I chose the Gitalk plugin. Gridea only requires four essential pieces of information to integrate Gitalk comments into the site: Client ID, Client Secret, repository, and owner. The Client ID and Client Secret need to be obtained by registering an OAuth App. The steps are as follows:
- In the top right corner of GitHub, click your profile icon and select “Settings.”
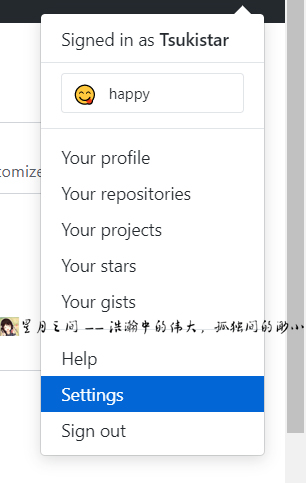
- Click “Developer settings,” then “OAuth Apps” → “New OAuth App”
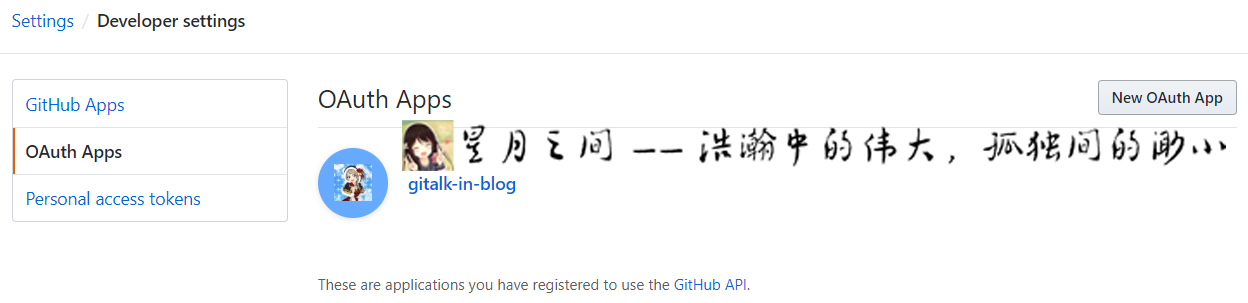
- On this page, fill in the Application name, the Homepage URL should be the repository URL where your Github Pages is located (e.g., https://github.com/username/repository), and the Application description can be left empty. For the Authorization callback URL, enter your Github Pages domain (distinguish between http and https).
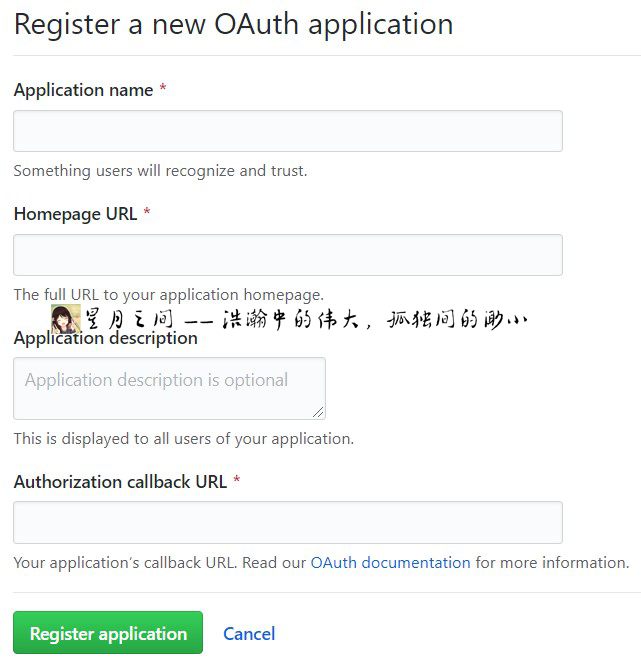
- After completing the application, copy the Client ID and Client Secret into the client, and fill in the repository and owner details in Gridea. This will enable you to use the Gitalk comment plugin!
Using Coding Pages
From my personal experience, Coding Pages is definitely much stronger than Github Pages. For the registration and configuration process, you can refer directly to the official tutorial.
For Gitalk, there are two things to modify in the OAuth App:
- The Homepage URL: You can create a repository and enter the URL of that repository.
- The Authorization callback URL: Enter the domain of your Coding Pages (distinguish between http and https).
Then, in Gridea, fill in the repository name used in your OAuth App and the GitHub username of the account that created the repository in the “owner” field.
Unless otherwise stated, all articles on this blog are licensed underCC BY-NC-SA 4.0license. The author reserves all rights. Please credit the source if you wish to reprint.